Today we will be making a whole (sliced) pizza for our dolls!
YOU WILL NEED:
1 - 2 ounce package of BEIGE polymer clay (crust)
1 - 2 ounce package of "red brown" polymer clay (pepperoni) - I used one called "Pottery"
assorted clay colors for your veggies: Green (bell pepper), Black (olives), beige (mushrooms)
1 - 2 ounce package of WHITE polymer clay (mozzarella cheese)
Translucent Liquid Sculpey (to make your pasta sauce and cheese)
Triple Thick (clear glaze to seal your finished pizza) AND dedicated paintbrush to apply
Pastel Chalks (for creating color on your pizza crust) AND dedicated paintbrush to apply
Polyblade (for cutting your clay)
a clay "plastic roller" or a clay "pasta machine" (for rolling out your clay)
toothpicks
tinfoil (AND / OR a dedicated glass baking dish)
oven
Dried Spice (like Thyme, Oregano, etc.) ***Optional
DIRECTIONS:
1. I purchased a CANDLE STAND at MICHAEL'S to use as a pizza / cake stand. This candle stand can be found in their candle section, and was $7.99 (use a coupon to get cheaper). If you do not want to purchase a candle stand, you will need to make a circle (using a small bowl or large plastic cup) that measures 5" in DIAMETER:
CRUST:
2. Open your 2 ounce package of beige clay, warm in your hands by slowly kneading it, and then roll out your clay using your roller/pasta machine.
You may have to tear your clay into strips and lay them "overlapping" onto each other to get it wide enough to be 5" x 5" (5" diameter)....
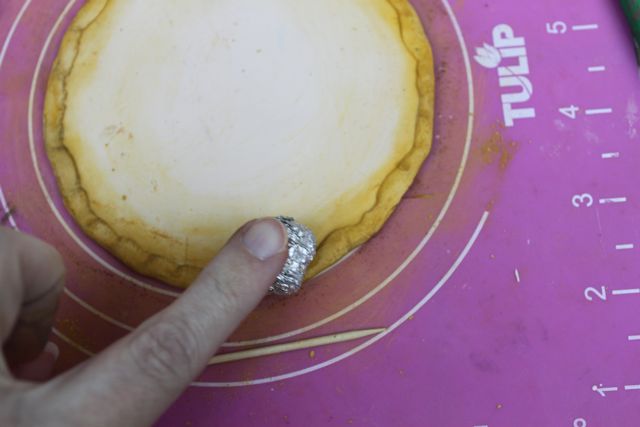
3. When you have it wide enough (5" diameter), lay your candle stand inverted down on top of your clay and press down. You are trying to make a small indentation into the surface of your clay:
4. Now use your Polyblade to cut around your circle "indentation". Roll up any excess beige clay and save to the side (we can use this for our mushrooms):
5. Lay your crust down onto your candle stand top (or on a table if you don't have the stand), and gently fold in the edge of the circle (going all the way around) to create your pizza crust:
6. Next, gather your pastel chalks and dry chalk paintbrush. You will need pastel chalks in "crust colors": a creamy yellow, a red-brown, and a dark brown.
7. Begin shading your pizza crust edge with your yellow and your paint brush (see video above if you need a visual).
8. After shading your top crust edge with yellow (this was so it wouldn't stick to the table), flip your crust over onto it's top, and begin shading the bottom with yellow.
9. After shading the bottom with yellow, use a small ball of tinfoil to roll across the clay and add "texture":
10. Then use your red brown chalk to add a bit of darker crust color to the bottom:
11. Now add a bit of dark brown chalk to give the crust a "burnt in oven look", especially along the edges:
12. Flip your crust back over onto it's bottom. Use your tin foil to roll around the edge of the crust to give it "texture":
13. Use your red brown chalk to add deeper color to the crust:
14. Now use your dark brown chalk to add the "burnt in oven" look to the crust edges:
15. Lay your colored crust onto a piece of tinfoil and set aside. Now your crust should look like this:
VEGGIES:
16. Take a small ball of your black clay, and roll it out into a snake (about the same width as a toothpick), then set aside onto a piece of tinfoil:
17. Take a small amount of green clay, roll out into a few snakes (width of a toothpick), mash the snakes FLAT with your polyblade or roller, and then set aside onto tinfoil:
18. You can use your leftover bit of beige clay from your crust... Roll into a small ball, then into a snake the diameter of a pencil.
19. Use your dark brown chalk to color the OUTSIDE of your beige snake, and then set aside onto tinfoil:
PEPPERONI:
20. Roll out your red-brown clay into a snake the same diameter as a pencil, and then set aside onto tinfoil:
21. You should now have all of your toppings set aside onto tinfoil like the picture below. Cook them in the oven at 275*, or until just hard enough to slice (these will be baked again when we bake the pizza):
22. Once items have baked and cooled, you can use your polyblade to carefully slice your toppings: Pepperoni, Olives, Bell Pepper, and Mushrooms (slice and then cut slice in half):
BUILDING YOUR PIZZA:
23. To make your sauce, you will need to pour a circle of TLS (slightly smaller than your pizza crust) onto a separate piece of tinfoil. Scrape red-brown chalk shavings into the TLS, mixing with a toothpick as you go, until the TLS resembles the color of pizza sauce:
24. Gently "pour" your sauce onto your pizza crust, and then spread it out using your mixing toothpick:
25. Add your pepperoni slices to the pizza, making sure to spread them out ALL OVER!
26. To make the "mozzarella cheese", I cut up white clay into tiny pieces, added them to a clean baby food jar, and then added TLS. Mix these together until you end up with WHITE liquid clay. (If you would like to see a video of this, view here:
http://www.youtube.com/watch?v=Q4V4nw-8xqA&list=PL9263EB58F2740703&index=89&feature=plpp_video (It is what she describes in the first 1:00 minute of the clip. She is making mashed potatoes, but "mashing" and "mixing" the clay longer will make it smoother like icing for a cake.)
27. Take a small portion of your white "liquid clay", place onto a piece of tin foil, add a tiny bit of water (to make it more runny), and mix with a toothpick:
28. Using the same toothpick, pick up "globs" of cheese and place them onto your pizza:
29. Use the toothpick to DRAG the cheese around on the surface of the pizza, making it look melted:
30. Sprinkle on some OLIVES:
31. Sprinkle on some BELL PEPPER:
32. Place on some MUSHROOM SLICES:
33. If you choose to add spice for realism, place a small amount into the palm of your hand, crush into small particles, and then sprinkle onto the top of the pizza:
34. Now you can place your pizza (still on the tinfoil) into the oven to bake according to manufacturer directions on your clay package.
35. Once baked and cooled, lay your pizza out to be sliced (or if you want it whole, don't slice it):
36. Use your polyblade to slice first horizontally (be patient and slow, it takes some determination):
37. Then spin your pizza around and cut horizontally again (now you have 4 large quarters):
38. Now cut your pizza diagonally, first from top left to bottom right:
and then from top right to bottom left:
39. Use your Triple Thick to glaze ONLY THE TOPPINGS of each slice of pizza. Do not glaze the crust or the bottom (you don't want shiny crust!):
40. After glazing each slice, place back onto the tinfoil and allow to dry overnight:
You now have a finished PIZZA!
YUM!!!
PLEASE REMIND YOUR CHILDREN THAT
THIS "FOOD" IS FOR PLAY
PURPOSES ONLY,
AND SHOULD NEVER BE PLACED INTO THEIR
MOUTHS!
Please feel free to use these plans to build furniture, for sale or for pleasure, but please do not sell the PLANS as your "own". Please also give credit to me and link back here! I hope you enjoy them!!
***I am NOT LIABLE for any plans featured here. Please take every precaution and use your own discretion to make sure these toys are safe for children to play with them.