
SHOPPING LIST: (You may have some of these pieces on-hand as SCRAP)
5/8" square dowel - 2@ 16.5" long (cross arms)
5/8" square dowel - 4@ 9" long
heavy string/twine - 6 feet long
#8-32x1-1/2" machine bolt - 1 (for cross mechanism)
#8-32 machine screw nut - 1 (for cross mechanism)
tape measure
small hand saw
drill
counter-sink bit
3/16" drill bit
1.25" screw (4)
sand paper (120 grit works well for this)
wood putty to fill holes and knots
Paint or stain to finish your piece (if desired)
INSTRUCTIONS:
1. Mark your sizes on your wood and cut out your pieces. (I always mark the wood with sizes AND where it is to be used (leg, side) so that I can move faster when building.

2. Sand your pieces (on the ends to be joined, at least, if not completely). You don't want to deal with edges that won't join cleanly and snugly.
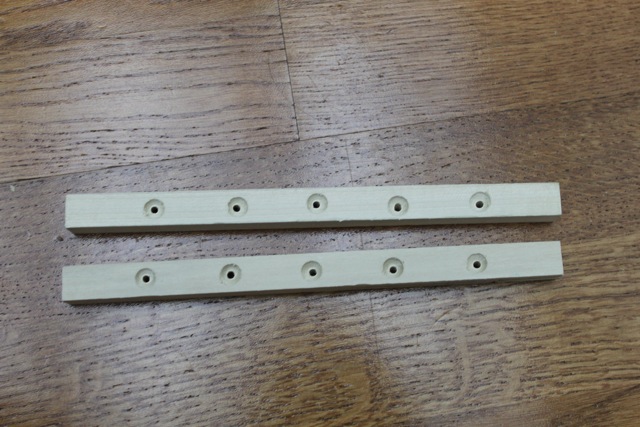
3. You should now have 6 pieces like this:

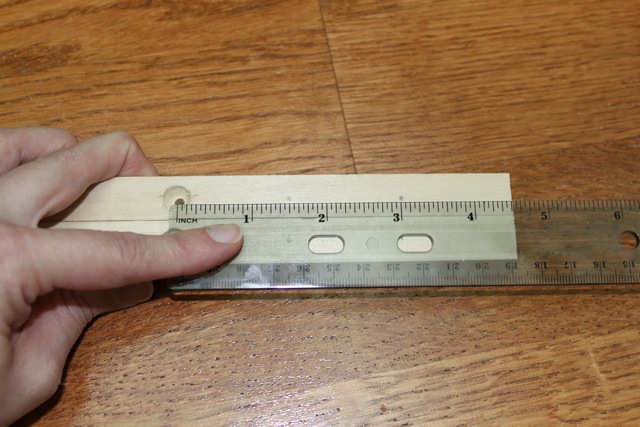
4. On the 16.5" legs, mark 7" in from ONE side on both leg pieces. Then, using a countersink bit, pre-drill holes on-center at the 7" mark. These will be your crossed "legs". Mark the side that you measured 7" from....this will be your "bottom" of the legs (pictured here on right side):

5. Now....using a 3/16" drill bit:


11. Next, using 1.25" screws, drill through the 4.5" center mark (9" boards) into the holes you drilled at the ends of the 16.5" legs:

12. Last step: Make a knot in one end of the string, and wrap a piece of tape around the other end of the string. Thread the taped side of the string through the arm holes, starting at the OUTSIDE BOTTOM of one arm, then UP through the outside hole, ACROSS to the opposite arm, DOWN through that hole, OVER to the hole next door, UP through that hole, and then ACROSS to the opposite arm and DOWN through that hole. TIE OFF in a tight knot. REPEAT for the other side of the X.
You now have a cute little addition to your doll world!! Accessorize and ENJOY!!
Straw hat: Hobby Lobby
Metal Tubs: Michaels
Wooden Crate: Michaels
Baby: Target
Apples: folk art from family trip


Clothespins from Michaels:

Please feel free to use these plans to build furniture, for sale or for pleasure, but please do not sell the PLANS as your "own". Please also give credit to me and link back here! I hope you enjoy them!!
***I am NOT LIABLE for any plans featured here. Please take every precaution and use your own discretion to make sure these toys are safe for children to play with them.
No comments:
Post a Comment
Please leave a comment or a question - I don't bite and would love to write back, especially if you'd like help or have questions!!