Sunday, September 19, 2010

Pretend Play: Wooden "Gas Pump"

I want to thank Ana White at http://ana-white.com/ ......if it weren't for you, Ana, I would never have been brave enough to try this on my own, or to have the skills (which you taught me!) to complete it!!! My daughter and I THANK YOU!!!

I have had this half-made for months! I finally got serious yesterday and finished the gas pump. I realized that I made this from entirely salvaged parts and scrap wood...so it was FREE! As soon as it was dry, my daughter HAD to play with it....

I started with a simple "box" out of 1x10's (sides, top, bottom) and then added a 1x4 stile to the top and a 1x3 stile to the bottom. I then glued and nailed a piece of MDF inside the box to create the "face" of the gas pump:
**The "key pad" is a Gerber (plastic) food lid painted black and an old cell phone key pad glued to the top. ***UPDATE: I originally used hot glue to adhere the cell phone pad to the plastic Gerber lid, but within 2 days my daughter had pulled it off.  I had read great reviews on GORILLA GLUE, so I purchased some and used that to glue the cellphone pad onto the plastic lid.  THIS WORKED GREAT! It is VERY solidly "on there".  (I have not been paid or given free product.  This is simply my opinion.)
**The "gas selection" buttons, "readout screen", "attendant speaker" and "card reader" are all pieces of hobby wood.
**The CHEVRON logo is printed from Google images and decoupaged onto the front.
**I used Behr Polar Bear in Semi Gloss to paint the piece, although I wish I could have used silver and black!

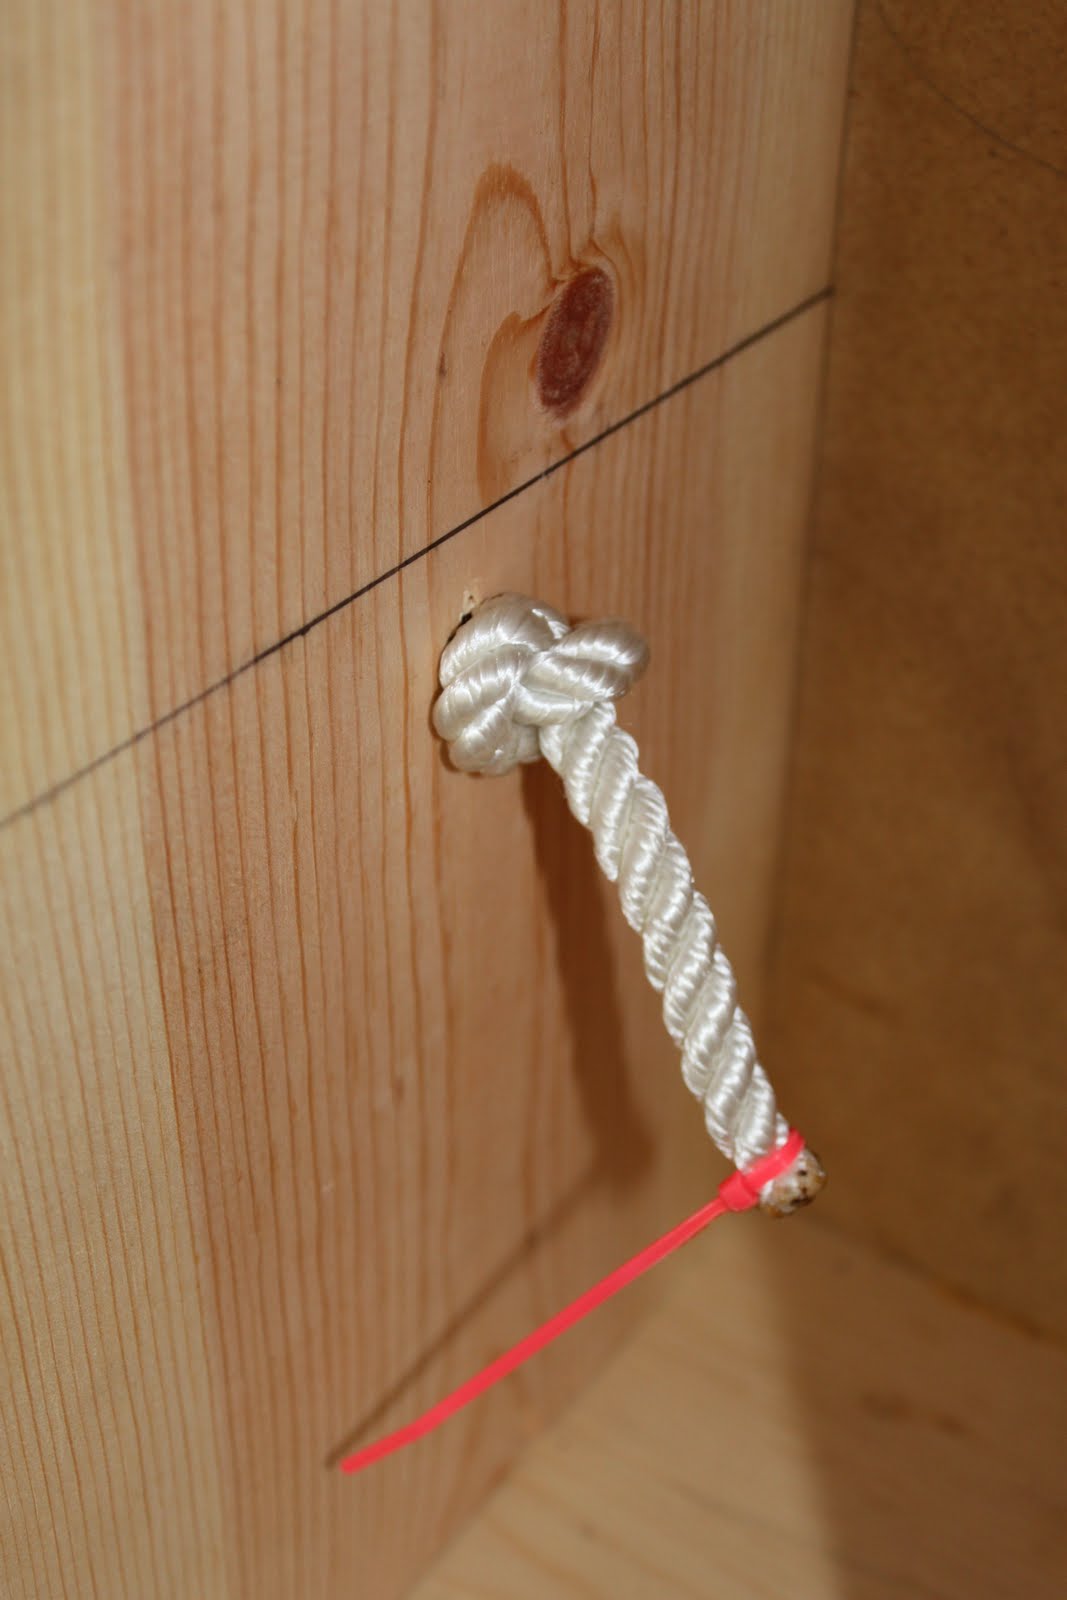
After painting the piece, I mounted a 45 degree ABS elbow (2"? pipe) to the side of the gas pump for the pump nozzle to rest inside of. I then placed the gas pump nozzle into the elbow (to estimate placement of hole), and then drilled a hole for the "hose" (rope) to go. (I covered the hole with a bottle cap that I hot glued in place to make it look nicer, and fed the rope through to the inside. I then knotted the rope, and sealed the end with a zip tie and blow torch to prevent fraying:


I made the pump nozzle from some "old contractor parts" my husband had in the garage: electrical 45 degree PVC sweep (the "nozzle end") and an electrical 90 degree pull box (the "handle end"):


Now we're ready to swipe the debit card....

punch in our PIN number.....

and "fill 'er up"!

Happy Building!!

Please feel free to use these plans to build furniture, for sale or for pleasure, but please do not sell the PLANS as your "own".  Please also give credit to me and link back here!  I hope you enjoy them!!

***I am NOT LIABLE for any plans featured here. Please take every precaution and use your own discretion to make sure these toys are safe for children to play with them.

Friday, September 10, 2010

Baby Doll: Bassinets

I've decided to go through my craft stash....and make Christmas presents for the kids. I never knew I had SO MUCH fabric, or so many unfinished (READ: half-way done and I gave up or got side-tracked) projects!

I have a 2 year old niece who is fascinated with baby dolls and pretending to be "mommy". She's a girlie-girl. I searched the internet and was introduced to TWELVE CRAFTS TILL CHRISTMAS, and her doll bassinet tutorial! Brilliant idea for me to use!


***I will allow her to tell you how to do it...can't improve upon perfection.

Here's the finished product for my niece (using my stashes of fabric, lace and quilt batting):

And, of course, why make 1 when you can make 2 just as easily!! So....here is one for my daughter:

And then.....my daughter found them. SO EXCITED! She said "not Cwis-mus, mommy", and that was that. We took the other bassinet to my niece (didn't want them arguing over the same bassinet while we visited), so I guess I'll have to make something else for Christmas. :)

***I am NOT LIABLE for any plans featured here. Please take every precaution and use your own discretion to make sure these toys are safe for children to play with them.

Pretend Play: "Doctor" Lab Coat

My daughter is fascinated with all things "medical" because we have some doctors in the family. She is always trying to "doctor" us, so I decided she needed a lab coat to go with her doctor bag:


I simply purchased a white collared button-down long-sleeved shirt for $2 from Goodwill. After a GOOD washing in some bleach and ironing after drying, I measured my daughter's arm length from her collar bone to her wrist and added an inch for hems. I transferred the measurement to the shirt sleeves, lopped them off at the mark, and hemmed them.

Then I used the left over sleeves to make 2 pockets for the front (bottom) of the lab coat. I pinned and hemmed the pockets first, then pinned and sewed them to the shirt, leaving the top of the pocket open (duh!). I then added large buttons down the front (for affect) and velcro to the inside placket (for ease of child play). A plastic name tag (on-hand) completes the look. Can't beat $2!

***I am NOT LIABLE for any plans featured here. Please take every precaution and use your own discretion to make sure these toys are safe for children to play with them.