Part 3: Upholstery - Fabric
Today we will finish the upholstery of the sofa by adding the fabric cover and cushions!
SHOPPING LIST:
3/8" staples
staple gun
pencil or marker
scissors (to cut fabric)
yardstick or tape measure (to measure fabric)
4 - 2" screws (for attaching the arms to the sofa base)
fabric of your choice***, cut into the following measurements:
SOFA:
1 @ 23" x 3" (front of sofa base)
2 @ 8.5" x 3" (Left and right sides of sofa base)
1 @ 15" x 25" (over back of sofa)
2 @ 5" x 5" (front of Left and Right arms)
2 @ 10" x 10" (over Left and Right arms)
CUSHIONS:
4 @ 10.5"w x 7.5"d (cushion top and bottom - 2 each cushion)
4 @ 10.5"w x 2" (sofa cushion front, back - 2 each cushion)
4 @ 7.5"w x 2" (sofa cushion sides - 2 each cushion)
***I suggest using a HEAVY- WEIGHT fabric (like those intended for upholstery) so that you won't having fraying edges later
INSTRUCTIONS:
1. Lay your sofa on its back with the feet facing away from you. Drape your fabric RIGHT SIDE DOWN over the sofa base, leaving a small amount pooled at the front base:
2. That small piece at the bottom will be your "blind hem". While smoothing your fabric, press your staple gun into the center, making sure to catch about 1/2" of fabric:
3. Staple all the way to both ends, making sure to keep your fabric smooth and even:
4. Now flip your fabric FORWARD towards you (you have created a "blind hem" with your hidden staples):
5. While holding your fabric fairly taut and straight, flip your sofa over (away from you) onto its face, so that the undersize of the sofa (feet) is facing you. Pull your fabric TAUT, but don't over tighten:
6. Pinch your fabric up in the center:
7. and fold under:
8. Place a staple or two there to hold your folded hem in place:
9. Continue along the bottom, folding and stapling, out to each side. Stop about 2" from each end. Flip your sofa up onto its feet. It should now look like this:
10. With your sofa facing towards you, lay your 23" strip along the sofa front base edge, RIGHT SIDE DOWN, making sure that the fabric is centered:
11. Create a 1/2" fold in the front of the fabric, and then bring that fold up to the front edge of your sofa base:
12. Place a staple in the center top front:
13. Continue folding and stapling all the way out to both ends, stopping about 2" from the ends. (Ignore my batting hanging there...daughter tore it off, but it will be stapled back on.)
14. On the RIGHT sofa end, flip your front edge piece out of the way:
15. Make a 1/2" fold in your 8.5" fabric, bring to the edge (centered at ends), and staple in the front corner:
16. Continue folding and stapling all the way to the other side:
17. Flip your sofa over:
18. Fold your fabric, and begin stapling along the bottom edge, making sure to leave your arm screw holes uncovered:
19. Staple all along the bottom edge to the other end:
20. The top edge should now look like this:
21. Now for the left side:
22. Fold and staple:
23. Flip over, fold and staple:
24. Your sofa should now look like this:
25. Now pull your front base edge fabric taut:
26. flip your sofa over:
27. Fold your fabric (I folded mine twice because I had some excess):
28. and then staple along the front underside edge to both ends. Stop about 1" from each end:
29. We will be folding up the front ends like wrapping a package:
Top edge down:
Hold in place:
Pinch the bottom up:
Pinch pleat them together toward the bottom:
Hold in place with your thumb:
And then add a couple staples in the corner to secure:
30. Your sofa should now look like this:
31. Repeat these steps on the other base edge.
32. Stand your arms up in front of you, so that the front ends of the arms are facing UP:
33. Place your 5" x 5" fabric onto your arm end, center it well, and then lay your arm down on its base. Staple the top of the fabric into the top of the arm, about 1" back from the front end. Fold the fabric down over the front of the arm:
34. Flip the arm over onto its top. Pull the fabric taut, fold a small seam, and staple to the underside of the arm (be sure not to cover up the screw hole!):
35. Lay your arm on its side. Fold the fabric inward on each side (like the end of a present), and then staple that in its center. Repeat on the other side of the arm:
36. The end of your arm should now look like this:
37. Repeat steps for your other arm:
38. Your arm should look like this:
39. Take your 10" x 10" fabric, RIGHT SIDE DOWN, and fold a small hem along one side:
40. Place your LEFT and RIGHT sofa arms with their INSIDE (pencil mark) facing upward and the BOTTOM of the arm facing toward you. Then place your 10" x 10" fabric on the arm bottom edge (closest to you), with the folded seam you just made running perpendicular to the arm edge (it's next to my thumb):
41. Now staple along that fabric, AS CLOSE to the wood edge as you can get:
42. Now fold your excess fabric up along the BACK of the arm, creating a hem flush with the edge at the back:
43. While holding your rear hem "in place", begin "rolling" your arm up in the fabric:
44. When you have finished rolling and reached the bottom edge, trim off any excess fabric greater than 1.5":
45. Fold up your fabric to create a hem:
46. Staple along the bottom. When you get to the front end, make sure that your ends are folded and TUCKED away from the front edge:
47. Mark your 2 screw holes with a pencil or marker:
48. At the arms back end, fold your fabric like a present:
Inside edge:
Top:
Bottom:
Outside edge:
49. Your arms should now look like this (although they are not yet attached):
50. On the back side of your sofa, continue to hem that you had been folding along the bottom back side. Keep it folded with your fingers or pins, but lift it up out of the way:
51. Fold your side edge fabric end inward, and staple on the back corner:
52. Fold down your sofa seat back fabric along the sofa back edge:
53. Staple into place at edge of fabric:
54. With your sofa facing down, pull out the front edge of fabric, making sure to keep the seam folded:
55. Fold that fabric in half:
56. Fold that fabric again, creating a seam along the sofa back edge. Staple into place at the bottom and middle (don't staple at the top!):
57. With your sofa still facing down, fold the back fabric to create a hem, and pull taut, and secure with a pin to hold your seam:
58. While holding taut, flip the sofa over onto its top. Screw on your sofa arm using 2 - 2" screws in each arm. Staple the back fabric into place on the underside of the sofa, and then remove pin:
59. Now simply whip stitch or hot glue the edge of your sofa back fabric into place along the top side of your sofa back edge and back of arm (this hides all traces of staples on the top side of the sofa).
60. Repeat steps 50-59 for the other side of the sofa back. Your sofa should now look like this:
61. Assemble your cushions by sewing (RIGHT SIDES TOGETHER) the 4 sides to the top, the 4 side seams together, then attaching the bottom using 1/2" seams. Leave a small opening for turning and stuffing. After stuffing, stitch your seam opening closed. Add your sofa cushions to your sofa.
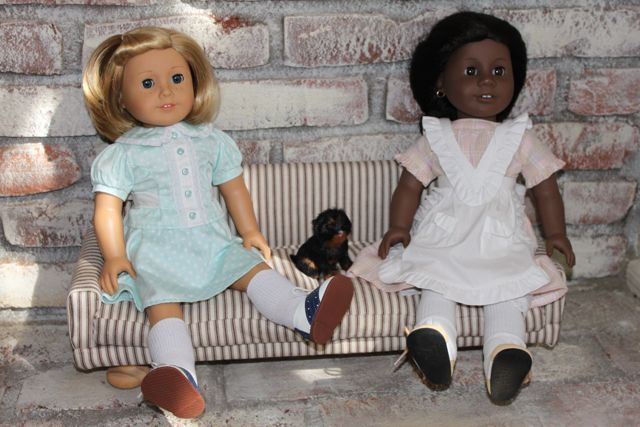
62. You may want to make throw pillows or other such additions to add "visual depth" to your sofa. Have fun!
My Twinn: 23" tall (standing) and American Girl: 18" tall
Pictured below:
Please feel free to use these plans to build furniture, for sale or for pleasure, but please do not sell the PLANS as your "own". Please also give credit to me and link back here! I hope you enjoy them!!