Upholstered Sofa
PART 2: Upholstery-Batting
Today we will work on adding the batting (padding) to the wood sofa base
which we built in Part 1.
SHOPPING LIST:
**Staple gun
(I use a Power Shot because it's easier for women:
http://www.lowes.com/pd_29965-412-5700WAF10_?PL=1&productId=1243797 , but any staple gun would work.)
**3/8" staples
**scissors (to cut batting)
**yard stick or tape measure (to measure batting)
**1 - package of Quilt-Light Batting (45"x60"-crib size, $10 - use a COUPON!) http://www.joann.com/joann/catalog/productdetail.jsp?pageName=search&flag=true&PRODID=prd2775
Cut your batting into the following sizes:
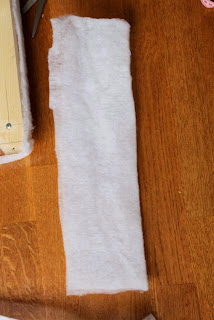
2 @ 1.5" x 21" (front and back base edges)
2 @ 1.5" x 7" (left and right base edges)
1 @ 1.5" x 25" (top seat back edge)
2 @ 6" x 10" (left and right arms - ARMS - folded in half to double thickness)
1 @ 11" x 19" (for seat back cushion on FRONT - folded in half to double thickness)
1 @ 5" x 19" (for seat back cushion on BACK)
8 @ 2" x 6" ( 2 for each side of each arm)
2 @ 8" x 8" (for going over top of each arm)
1 @ 19" x 11" (for going over seat back from base of front to base of back = 11")
INSTRUCTIONS:
1. Staple your 1.5" x 21" pieces to the front and back base edges of your sofa, and your 2-1.5"x 7" pieces onto the sides of your sofa base:
2. Staple your 1.5" x 25" piece over the top of your sofa seat back, making sure to center it, and not stapling it below where your arms meet the seat back on the side:
3. Take your 11" x 19" piece and fold in half lengthwise:
4. Staple to the front of your seat back:
5. Flip your sofa forward onto its top:
6. Staple your 5" x 19" piece onto your sofa back:
7. Flip your sofa back onto its feet. It should now look like this:
8. Take your sofa arms and sit them on your sofa, making sure that you place the Left one to the LEFT and Right one to the RIGHT as you marked when you were building.
9. Using a pencil, and making sure that your arm is flush to the sides and back of the base of your sofa, mark where your sofa back MEETS your sofa arm. REMEMBER: you did not put the batting down this far. It is simply wood against wood:
10. Your arms should now look like this, LEFT and RIGHT (ignore the batting...it's next):
11. Take both of your 6" x 10" pieces and fold each in half lengthwise. Staple them to the TOPS of your arms and down the front of each arm, so that it looks like this:
12. Now take 2 pieces of 2" x 6" (for EACH side of EACH arm) and staple them on:
13. Flip the arm over and do the other side.
14. Do both arms, both sides. Cut away the tiny rectangle at the INSIDE BACK of each arm (where you drew that pencil line):
15. Your arms should now look like this when placed on the sofa. Notice that the cut-away portion helps the arm to rest snug against the sofa back:
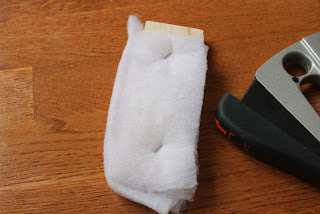
16. Now lay out your piece of 8" x 8" batting. Place your arm down on it with the front end facing toward you:
17. Roll your arm over:
18. Bring up the end of the batting and staple at the bottom edge of your arm. Flip the arm over and staple the other side. Repeat with the second arm.
19. You will have some excess sticking out over the sofa arm end and at the bottom...
Let's trim that excess away:
20. You will notice that the new batting piece covers the little rectangle you trimmed earlier:
21. Trim that batting away again, following your previous pencil line (both arms):
22. Trim away the batting from the bottom of your arm:
23. Now your arms should look like this:
24. Lay your sofa on its back with the legs facing away from you:
25. Lay your piece of 11" x 19" batting on your sofa seat back, and staple at the base (top edge of batting shown in pic):
26. Flip your sofa over onto its front, feet facing away from you, and pull the batting "snug" from the front (but don't RIP IT!). Place 1 staple in the center back of the sofa, as shown:
27. Add one staple in the right corner and the left corner, about 3" up from the feet:
28. Cut away the batting on each side where the arms will meet the seat back. You don't want extra bulk getting in your way later.
29. On each end, fold your batting edges inward and staple:
30. Your sofa should now look like this ***:
***We will be attaching the arms to the sofa after we have upholstered them in a later step.
PART 3: Upholstery-Fabric
Coming Soon!
Please feel free to use these plans to build furniture, for sale or for pleasure, but please do not sell the PLANS as your "own". Please also give credit to me and link back here! I hope you enjoy them!!
***I am NOT LIABLE for any plans featured here. Please take every precaution and use your own discretion to make sure these toys are safe for children to play with them.


No comments:
Post a Comment
Please leave a comment or a question - I don't bite and would love to write back, especially if you'd like help or have questions!!