Wednesday, February 23, 2011

18" Doll: Large Bookshelf


SHOPPING LIST: (You may have some of these pieces on-hand as SCRAP)

2 - 1x4@ 18" (for sides of bookshelf)
3 - 1x4@ 11.5" (for bookshelves)
1 - 1x4@ 14.5" (For top of bookshelf)
1 - 1x2@11.5" (for bottom front toe kick)
1 piece of MDF @ 17"h x 12.75"w - for backing of shelf (****if desired - I left mine open)

Air nailer / 1.5" Nails
square
tape measure / pencil
small hand saw
120 Grit sand paper
wood putty to fill holes and knots
Paint or stain to finish your piece (if desired)


INSTRUCTIONS:

1.  Cut out all of your pieces of wood to the sizes specified in the shopping list.

2.  Lay out your 2- 18" side pieces (side by side, so that they are lined up), and mark where your shelves will be placed.  (This keeps the shelves level when nailing them on later.)


My shelves were placed at the following measurements:
Lowest Shelf = 1.5" from bottom of bookshelf sides to BOTTOM of  lowest shelf
(this allows room for the toe kick to be nailed onto the bottom FRONT of the bookshelf - it is 1.5" high)
Middle Shelf = 7.5" from bottom of bookshelf to BOTTOM of middle shelf
Top Shelf = 12.75" from bottom of bookshelf to BOTTOM of top shelf

Here I am figuring out where I want my shelves to sit (based on how tall my books and accessories are):


 3.  After marking placement for all shelves, nail on your toe kick and then your lowest shelf right above it:


4.  Stand your shelf up and toe nail DOWN THROUGH your lowest shelf into the 1x2 toe kick for stability:

5.  Nail on your middle shelf:

6.  Now nail on your top shelf:

7.  Nail on your TOP (14.5") to your bookshelf:


 8.  You are now ready to fill all of your nail holes and knots in the wood.

9.  When the wood putty is dry, sand the wood until smooth.

10.  Stain or paint to finish as desired.  Once dry.....ACCESSORIZE!!

I made it the same height as the dining hutch so that they can be used together!


Ceramic Pitcher, White ceramic bowls, Mortar & Pestle, 2 Wood Bowls, 3 Glass Jars = World Market (see previous post for details and pricing)

Bird Cage = Michaels
3 Glass Corked "Science" Jars = local library
Ship in a Bottle = MakingFriends.com
Glass Oil Lamp = 4" tall (Green, Blue or Amber), $2.95/each
I'm pretty sure this lamp would "really work" if I tried!! SO COOL!! VERY fast shipping!

Please feel free to use these plans to build furniture, for sale or for pleasure, but please do not sell the PLANS as your "own".  Please also give credit to me and link back here!  I hope you enjoy them!!

***I am NOT LIABLE for any plans featured here. Please take every precaution and use your own discretion to make sure these toys are safe for children to play with them.

18" Doll: World Market Finds


Look what I found at World Market!!

Creamer 4 ounce (Small ceramic pitcher) = $1.99 (433978)
S&P Mini Shaker (Shaker Bottle) = $.99 (438782)


Tea Set in wicker basket = $7.99 (#400601)


Mortar and Pestle = $3.99 (335250)


Large 4.5" Wooden Prep Bowl = $1.99 (435465)
Small 3" Wooden Prep Bowl = $1.49 (432368)
Mini Metal Tart Pan = $1.49 (424428)


Sauce Dish (Small Ceramic Bowls) = $.99/each (067435)


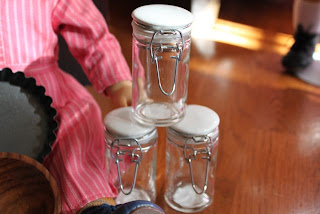
Glass Spice Jars = $.99/each (402745)


Please feel free to use these plans to build furniture, for sale or for pleasure, but please do not sell the PLANS as your "own".  Please also give credit to me and link back here!  I hope you enjoy them!!

***I am NOT LIABLE for any plans featured here. Please take every precaution and use your own discretion to make sure these toys are safe for children to play with them.

Monday, February 14, 2011

18" Doll: Doll Accessories @ Joanns


I found two cute items in the Joann's $1 bin!

The first is a small "travel" football game....but I got it for the MINIATURE DICE!!


The second item is a nail polish set....the nail polish is AG size!!!


I also found a nice pair of scissors at the Dollar Tree in their sewing kit ($1):


I wanted to point out in this post that you can find lots of AG size miniatures by simply "keeping an eye out" for items of that scale and size! :)  These become inexpensive additions to your AG accessories!

Please feel free to use these plans to build furniture, for sale or for pleasure, but please do not sell the PLANS as your "own".  Please also give credit to me and link back here!  I hope you enjoy them!!

***I am NOT LIABLE for any plans featured here. Please take every precaution and use your own discretion to make sure these toys are safe for children to play with them.

18" Doll: Dining Chairs @ Michaels


I found these ADORABLE metal chairs at Michaels!
They remind me of the metal chairs and table from this set:
or
(I think they were $16.99/each.  Use your 40% coupon....and that's a GREAT deal!)

While I was at Michaels, I also found some cute AG miniatures for upcoming projects:

Wicker Picnic Basket: wood crafts $1 bin section (seen in my camping pics)
Small Cupcake: $1 bins up front (this is actually lip gloss)
Tin Bird House and Bucket: $1 Bins up front
Round Picture Frame: $1 Bin


I also get my tea lights from Michaels:


And then I also found this:


It's a tiny candy "bin"....it was with their "bulk colored M & M's" that they use for parties!!
This will be GREAT for a doll store! :)

Please feel free to use these plans to build furniture, for sale or for pleasure, but please do not sell the PLANS as your "own".  Please also give credit to me and link back here!  I hope you enjoy them!!
***I am NOT LIABLE for any plans featured here. Please take every precaution and use your own discretion to make sure these toys are safe for children to play with them.

Thursday, February 10, 2011

18" Doll: Campfire


Every doll needs to go camping!!!

SHOPPING LIST: (You may have some of these pieces on-hand as SCRAP)

10.5"x5" piece MDF or thin scrap wood
1 - LED flickering tea light (Michaels Crafts)
hole saw drill bit (large enough to make a hole the size of the LED tea light - about 1.5")
several small assorted rocks/pebbles
sticks and/or branches cut into pieces (make sure they are DRY)
Pruning Shears or Utility scissors (for cutting the sticks/branches)
Elmer's school glue (to glue on the sand/dirt)
sand or dirt (to cover the board)
Hot Glue Gun / glue sticks
Brown Acrylic paint / paint brush
small scrap of sand paper (to sand the edges of the board after cutting)

INSTRUCTIONS:

1.  Figure out where you want your tea light to sit on your board.  (The tea light will be accessible from underneath the campfire so that it can be turned on/off.)  You will need to draw a circle around your tea light with a pencil to mark where you have chosen for it to sit.  (I chose for mine to be off-center so that I could make a "cooking area" off to the other side.)

2.  Use your hole saw drill bit to cut out the round circle that you drew on the board:

3.  Sand the outside edges of the board and the inside of the new circle you cut.  Use your brown acrylic paint to paint around the hole you cut out (I didn't do this until MUCH LATER, and it was HARD...so do it NOW!) so that the board doesn't show through the sticks later.

4.  Start laying out your "rocks" in a pattern desirable to you:

5.  When you are satisfied with the layout of your rocks, begin HOT GLUEING them down to the board:

6.  When you get all of your rocks glued down to the board, begin cutting your sticks and branches into short 3" to 4" lengths (if you cut varying lengths of wood it will look more "real"):


7.  Choose 2 sticks, and hot glue them together at the top, forming a "V":

8.  Position your tea light into the cut out hole.

9.  Grab another stick.  Lean your "V" sticks against the new stick, creating a "tee-pee" shape, and HOT GLUE all three together at their meeting point:

10.  It will be a bit "wobbly", but we will fix that!  Add another stick to the mix, and hot glue at that meeting point:

11.  And then add another stick on a different side, making sure to hot glue that meeting point:

12.  Find a LARGER diameter stick.  "Anchor" it in the rocks with hot glue, and then glue it to the "tee-pee" of sticks:

13.  Add a bead of hot glue to the base of each stick that you have added to your "tee-pee".  This will help with stability:

14.  I cut a few shorter sticks to fill in on the sides (from now on use hot glue on the top AND bottom of the stick as you attach it):


15.  Add a few longer and shorter sticks around the entire piece, attempting to fill in the "empty" spots:

16.  Cut a few smaller diameter sticks and use them to fill in the "holes":


17.  I then added a few pieces "laying down" on their side for realism:


18.  Gather your Elmer's glue, sand/dirt, and a paint brush:

19.  Squirt the glue onto the board surface, and use the paint brush to spread it into all of the small crevices between rocks and sticks (didn't get that picture!):

20.  Dump sand onto the glue.  Mash the sand into all of the crevices that you covered with glue:

21.  Tap off the MAJOR chunks of excess sand, and then place outside to dry overnight:

22.  Cover the edges and inside of the tea light "circle" cut out with brown acrylic paint:


23.  Your Campfire is finished!!
GRILL SHOPPING LIST:

2 - roughly 4" pieces of wood dowel (adjust the size of the dowels to fit your rock formation at the  "cooking end" of your campfire)

12 to 16 wooden toothpicks (cut off the pointy ends)
hot glue gun / glue sticks
silver acrylic paint / paintbrush

GRILL INSTRUCTIONS:

1.  Cut your 2 pieces of dowel to fit the size of your campfire:

 2.  Glue your toothpicks to one of the dowels, making sure they are evenly spaced.  Then trim the free ends of the toothpicks so that they are all the same length:

3.  Glue the dowel to the free ends of the toothpicks, creating a "ladder":

4.  Paint the entire grill silver.

5.  Add to your campfire!


Tent, Dutch Oven, Pancake Griddle: 
Dogs: Ty Beanie Babies ($5 each)
Soccer Ball: $1 bin at Joann
Food in Basket and on Crate:  
Wooden Crate and Picnic Basket: Michael's - wood crafts section ($1 each?)

Please feel free to use these plans to build furniture, for sale or for pleasure, but please do not sell the PLANS as your "own".  Please also give credit to me and link back here!  I hope you enjoy them!!

***I am NOT LIABLE for any plans featured here. Please take every precaution and use your own discretion to make sure these toys are safe for children to play with them.