Kitchen Part 3: Stove

Part 1: Kitchen Sink/Dishwasher can be found here:
Part 2: Kitchen Fridge can be found here:
SHOPPING LIST:
2 - 1x8 @ 11.5" (sides)
1 - 1x8 @ 12" (top)
1 - 1x8 @ 10-3/8" (bottom shelf)
1 - 1x8 @ 10-3/8" (bottom shelf)
1 - 1x2 @ 10-3/8" (toe kick)
1 - 1x3 @ 12" (back control panel)
1 - 1x3 @ 12" (back control panel)
2 - 5/8" square dowels @ 6" (runners for "shelf" inside)
1 - 1/4" MDF @ 11.75"Wide x 10.75"h (stove backing)
1 - 1/4" MDF @ 6.25"x10-3/8" (shelf)
1 - 1x12 @ 8.75" (stove door)
1 - 6.5"x6.5" clear acrylic (stove door insert) ***you will need 4 small screws to attach acrylic
1 - 1.5" wood round (clock) ***you can attach with wood glue/clamp
4 - 2.25" (.25"thick) wood rounds (burners) ***you will need 4 small screws to attach burners
1 - 2.75"x5.25" craft wood (.25" thick) (Grill burner) ***you will need 2 screws
http://shop.hobbylobby.com/products/wood-slats-756585/
5 - furniture buttons (stove knobs)
http://shop.hobbylobby.com/products/1/4-birch-furniture-buttons-621367/
1 - magnetic door clasps ***optional (they help the doors to stay closed, so it's a nice touch)g
1 - pairs hinges (cabinet and dishwasher) ***Everbilt Narrow Utility Hinges 1", Home Depot
1 - cabinet pull (dishwasher handle) ***Liberty 3" Pull, Home Depot
T-square
measuring tape
pencil
Drill / 2" wood screws
wood glue
wood clamps
saw
sand paper
painter's tape
wood putty (if you need to fill any holes)
paint to finish (I used GRAY latex for the exterior sides, and SILVER spray paint for the doors, BLACK spray paint for the burners, knobs, grill, clock)
INSTRUCTIONS:
***All of my building pictures were deleted during a large "computer problem". Use the building methods in this link for "basic" building instructions:
http://piecesforreese.blogspot.com/search/label/pie%20hutch
We are simply making a "shelf" with hinged doors on the front...nothing more complicated than that! :)
1. Cut out all of your pieces as described and sand them smooth!
2. Attach your 1x3 control panel to the top edge of your stove top using 2" wood screws.
3. Attach your sides to your top using 2" screws.
4. Attach the 1x2 toe kick to the bottom FACE of the stove, and then attach your bottom shelf directly on top of that using 2" wood screws.
5. Attach your wood dowels to the sides of your stove at 7" (from bottom of stove SIDES to the TOP of each dowel) using wood glue and clamps. Make sure that they are attached LEVEL and EVEN across from each other. Allow to dry overnight:


8. Paint the interior and exterior of your stove and door GRAY/SILVER. Spray paint your 4 burners, clock, grill, and knobs BLACK. Allow to dry overnight.
INSTRUCTIONS:
***All of my building pictures were deleted during a large "computer problem". Use the building methods in this link for "basic" building instructions:
http://piecesforreese.blogspot.com/search/label/pie%20hutch
We are simply making a "shelf" with hinged doors on the front...nothing more complicated than that! :)
1. Cut out all of your pieces as described and sand them smooth!
2. Attach your 1x3 control panel to the top edge of your stove top using 2" wood screws.
3. Attach your sides to your top using 2" screws.
4. Attach the 1x2 toe kick to the bottom FACE of the stove, and then attach your bottom shelf directly on top of that using 2" wood screws.
5. Attach your wood dowels to the sides of your stove at 7" (from bottom of stove SIDES to the TOP of each dowel) using wood glue and clamps. Make sure that they are attached LEVEL and EVEN across from each other. Allow to dry overnight:

6. Attach the MDF backing to your stove. Fill all screw holes with wood putty and allow to dry overnight. Sand until smooth.
7. On your 1x12 "door" piece, measure down from the top 2". This will be the TOP of the hole you will cut out. Cut a hole which measures 5.5"W x 5.25"h. Sand all edges until smooth.

9. Attach your acrylic to your stove door INTERIOR by first pre-drilling a hole in each corner of the acrylic INTO the stove door, and then screwing with 4 small screws. Attach all door hardware: hinges, pulls, magnetic closures.
10. Attach your burners and grill plate with screws, and glue/clamp your clock. Drill small holes and GLUE in your "knobs". Allow to dry.
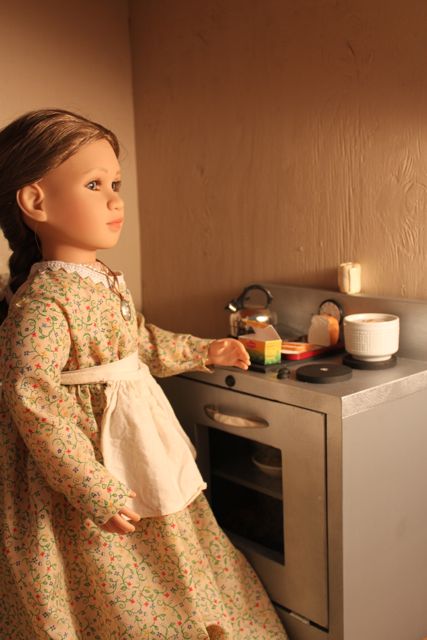
You are now finished and READY FOR PLAY!!!!


***I am NOT LIABLE for any plans featured here. Please take every precaution and use your own discretion to make sure these toys are safe for children to play with them.
All of these items are so sweet. Thank you for sharing :)
ReplyDelete